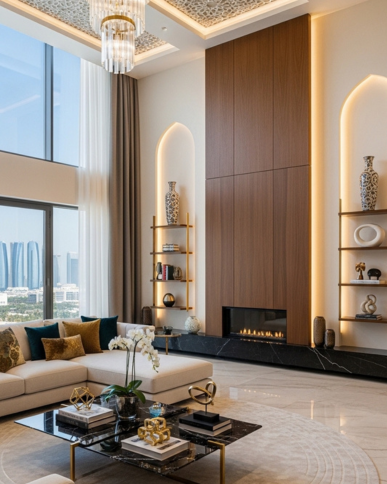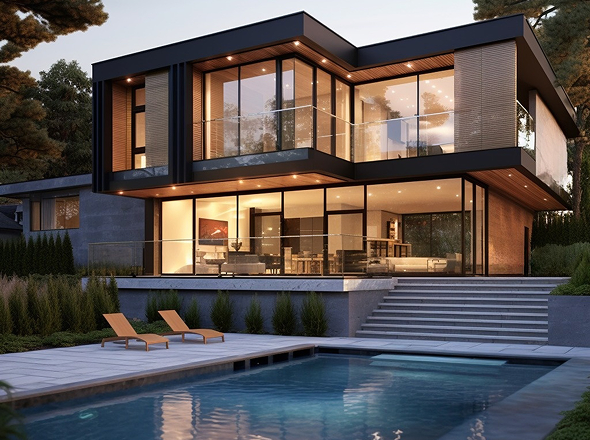
A villa owner in Abu Dhabi sits across from a contractor, holding paint swatches and fabric samples, trying to picture how a completely redesigned living space will actually look. That guesswork ends with 3D interior design visualization: the process of building photorealistic, computer-generated images of a space before a single wall is touched, allowing clients and designers to see, adjust, and approve every detail in advance.
This service translates architectural drawings and material selections into fully rendered scenes, complete with lighting, furnishings, textures, and spatial proportions. Across 120+ completed projects in Abu Dhabi, this approach has replaced the uncertainty of renovation planning with clear, agreed-upon visuals that guide execution from concept to completion.
This article covers:
- What 3D interior visualization is and how the rendering process works
- Benefits for both designers and homeowners, including how it cuts revision cycles
- Residential and commercial applications across Abu Dhabi property types
- The full workflow, file preparation steps, and software options for beginners
- Real project examples showing before-and-after impact
- How VR and AR technology is changing the visualization process in 2026
What Is 3D Interior Visualization
3D interior visualization is the process of creating photorealistic, three-dimensional images or animations of an interior space using specialized rendering software. A designer builds a digital model of the room, assigns materials and finishes to every surface, places scaled furniture and accessories, and configures lighting conditions to match the planned environment. The output is an image or video that looks indistinguishable from a photograph of a finished space.
The workflow begins with floor plans and measurements. A 3D modeler constructs the shell of the space, whether it is a bedroom, an open-plan living area, or an office reception. Materials, such as marble flooring, textured wall panels, or fabric upholstery, get mapped onto surfaces with accurate physical properties so reflections, shadows, and color rendering all behave correctly. Once the scene is fully built, a rendering engine calculates light behavior across every surface and produces the final image.
Abu Dhabi projects often require adjustments for local architectural features, such as wide-arched entryways in villas, double-height ceilings, and specific natural light conditions from the desert environment. A rendering that ignores the angle of afternoon sun through a west-facing majlis window will look nothing like the finished room, so accurate lighting setup is not optional.
Client collaboration shapes every stage of this process. A designer may present two or three material options as separate renders, letting a client compare a white Carrara marble finish against a warm-toned travertine in the same space before committing to an order. That conversation, grounded in visuals rather than sample boards, produces decisions that hold.
Benefits of 3D Visualization for Designers and Homeowners
Designers and clients each gain something different from 3D interior rendering, and those benefits stack when both sides work from the same visual reference point. Designers can communicate material pairings, spatial flow, and lighting moods with precision. Clients can evaluate and approve a design before any physical work begins. The result is a project that moves faster, costs less to change, and finishes closer to what everyone originally imagined.
For designers, 3D visualization serves as a technical document. Contractors, suppliers, and fit-out teams can reference the render to confirm dimensions, finishes, and placement. A photorealistic image of a custom-built media unit, showing exact proportions and veneer grain direction, leaves no room for interpretation on the workshop floor.
For homeowners, the benefit is confidence. Signing off on a full villa renovation is a large financial and emotional commitment. Seeing a lifelike image of the finished space before work starts removes the anxiety of the unknown and replaces it with informed decision-making.
How It Cuts Revisions by 40 Percent
Revision cycles shrink when clients can see exactly what they are approving. When a client reviews a 2D floor plan or a mood board, they often miss how spatial relationships actually feel, how a dark accent wall will read against light furniture, or whether a ceiling feature will feel proportionate in the room. Those misalignments surface during the build, triggering costly change orders.
A 3D render surfaces those issues before work begins. A client who sees that a proposed color palette reads as too cold under artificial lighting can request a warmer tone at zero material cost. The same change during tiling or painting carries real expense and delay. Design studios working with photorealistic 3D visualization report revision rates dropping by roughly 40 percent compared to projects that rely on drawings and samples alone.
The reduction comes from specificity. A render answers every visual question a client might have about proportion, material, color, and layout, so approvals are thorough rather than tentative.
Advantages Specific to Abu Dhabi Villa Owners
Abu Dhabi villa owners face a specific set of design decisions that 3D visualization handles particularly well. Villas in communities such as Al Raha, Khalidiyah, and Saadiyat Island often feature large open-plan ground floors where multiple zones need to coexist visually. Seeing those zones rendered in three dimensions makes it far easier to evaluate whether the dining area reads as distinct from the majlis, or whether the kitchen island creates an awkward visual barrier.
Material selection carries extra weight in Abu Dhabi’s climate. Flooring that looks neutral on a sample card can read as overly warm or cool depending on how much natural light enters the space. A render with accurate sun position data for Abu Dhabi’s latitude shows exactly how that material will look at midday in July versus in the cooler morning light of December.
Custom joinery, which features in most luxury villa projects across the capital, benefits from detailed 3D modeling before fabrication begins. A client can approve door profile, handle style, and grain direction on a rendered kitchen before the cabinet maker cuts a single piece of wood. That specificity protects both the client’s investment and the project timeline.
Residential Versus Commercial Applications in Abu Dhabi
The applications of 3D interior visualization differ between residential and commercial projects, not in the rendering process itself, but in what the visuals need to communicate and to whom.
Residential projects, covering villas, apartments, and penthouses, focus on lifestyle and personal taste. A render for a villa in Abu Dhabi needs to show how the space will feel to live in, how the family will move through it, and whether the design reflects the client’s character. Soft furnishings, art placement, and ambient lighting carry emotional weight in residential renders. Clients need to see themselves in the space.
Commercial projects operate on a different register. An office interior render for a company in Abu Dhabi’s financial district needs to communicate brand, function, and compliance. A retail space render for a shop in Yas Mall needs to show customer flow, display fixture placement, and how the brand identity reads from the entrance. Restaurant visualization requires lighting studies that show the difference between lunchtime brightness and evening ambiance, since the same space needs to work for both.
Across 120+ completed projects in Abu Dhabi spanning villas, offices, apartments, and retail environments, the visualization process adapts to each project type while the core workflow remains consistent. The technical requirements for a photorealistic apartment render and a commercial showroom render are similar. What changes is the story the image needs to tell.
Property developers in Abu Dhabi use 3D interior rendering for an additional purpose: pre-sales marketing. A developer can present a fully rendered show apartment before the building is constructed, giving buyers a concrete visual basis for their purchase decision. The accuracy of those renders directly affects buyer confidence.
Step-by-Step Workflow and Technical Requirements
Producing a high-quality 3D interior render follows a defined sequence. Skipping or rushing any stage results in a final image that fails to represent the space accurately.
Stage 1: Brief and measurement collection. The process starts with a design brief and accurate floor plan dimensions. Without correct measurements, the 3D model will produce proportions that mislead rather than guide. For renovation projects, site measurements should be taken by a designer, not estimated from outdated drawings.
Stage 2: 3D modeling. A modeler builds the architectural shell in software such as SketchUp, 3ds Max, or Blender. Walls, ceilings, floors, windows, and doors get modeled to scale. Custom architectural features like arched doorways or coffered ceilings require additional modeling time.
Stage 3: Material and furniture placement. Textures and materials get assigned to every surface. Furniture, either from a library or custom-modeled to match specified pieces, gets placed according to the layout plan. Accessories, including rugs, lighting fixtures, art, and plants, add the detail that makes a render feel inhabited rather than empty.
Stage 4: Lighting setup. Natural and artificial light sources get positioned and calibrated. Interior rendering engines simulate how light travels through glass, reflects off surfaces, and creates shadows. This stage often takes as long as the modeling itself, because lighting defines mood.
Stage 5: Rendering. The rendering engine processes the scene and produces the final image. Render time depends on scene complexity, image resolution, and processing power.
Stage 6: Post-production. Minor color grading, contrast adjustments, and composite work refine the image in software like Adobe Photoshop before delivery.
Preparing Files for Rendering
Sending a project to a 3D rendering service, or handing files between team members, requires organized, complete documentation. Incomplete file packages are the most common cause of delays in the rendering workflow.
A rendering-ready file package should include:
- Floor plan with dimensions in a standard format such as PDF, DWG, or DXF
- Elevation drawings for each wall that contains custom joinery, feature walls, or built-in furniture
- Material schedule listing every finish with supplier name, product code, and color reference
- Furniture specification sheet with product names, dimensions, and reference images for any specified pieces
- Lighting plan identifying fixture types, positions, and any natural light sources
- Reference images showing the style direction, mood, and any specific details the client has requested
Files delivered without material codes or with generic descriptions like “grey marble” force the modeler to make assumptions. Those assumptions produce renders that require multiple correction rounds before approval.
Beginner Software Tutorials and Free Tool Rankings
For designers entering 3D interior visualization, the software choice matters less than understanding the workflow. Start with a tool that has strong learning resources and a manageable learning curve.
SketchUp Free works well as a starting point. The browser-based version costs nothing, handles basic room modeling competently, and integrates with a large 3D warehouse of furniture models. The limitation is that its native renderer produces line-based, non-photorealistic output, so a plugin like Enscape or V-Ray is needed for photorealistic results.
Planner 5D and HomeByMe both offer free browser-based tools designed specifically for interior layouts. Neither produces professional-grade photorealistic renders, but both allow clients and beginners to explore space planning concepts quickly. They work well for early-stage layout conversations.
Blender is free, open-source, and produces photorealistic renders through its Cycles and EEVEE engines. The learning curve is steeper than SketchUp, but the output quality matches paid software when operated correctly. For designers willing to invest time in learning, Blender eliminates software licensing costs entirely.
3ds Max with V-Ray remains the industry standard for high-end photorealistic interior rendering. It is a paid subscription tool with a significant learning investment, but the output quality and workflow control it offers are the benchmark for professional rendering studios.
For beginners, the recommended starting path is: Planner 5D for layout concepts, then SketchUp Free with a basic renderer for early design presentations, then Blender or 3ds Max when professional output is required.
Real Project Examples and 3D Interior Visualization for Modern Homes
The gap between a design concept and a client’s approval often closes the moment a photorealistic render appears on screen. Across residential projects in Abu Dhabi, the visualization stage consistently proves to be the point where design direction locks in and client confidence peaks.
One pattern that appears repeatedly in villa renovation projects: clients who had expressed uncertainty about a design direction during the mood board phase give immediate approval when they see the rendered version of the same concept. A dark-toned bedroom with deep charcoal walls and brass fixtures sounds risky described in words or shown on a sample board. Rendered at scale with the client’s actual room dimensions, correct window placement, and calibrated artificial lighting, it reads as sophisticated and deliberate. The render does not change the design; it makes the design legible.
Modern home visualization projects in Abu Dhabi frequently involve open-plan spaces where the kitchen, dining area, and living zone flow together without partition walls. Rendering these zones requires careful attention to material continuity, how the kitchen cabinetry finish relates to the living room joinery, and whether the flooring tile chosen reads as one continuous surface or creates visual fragmentation. A render catches those discontinuities before materials get ordered.
One client renovating a four-bedroom villa in Abu Dhabi requested three separate living room layout options at the visualization stage. Seeing all three rendered to the same standard allowed the family to make a single, unanimous decision without a site visit. The approved layout went directly to execution without a single revision after the renders were signed off.
Client feedback from residential projects consistently points to the same advantage: seeing the space in three dimensions removes the emotional uncertainty that stalls decision-making and replaced it with the confidence to commit.
Emerging Technologies: VR and AR in Interior Visualization
3D interior rendering produces images. VR and AR place clients inside those images, and that shift in experience produces a measurable difference in how quickly and confidently decisions get made.
Virtual reality walkthroughs convert a rendered 3D scene into an immersive environment that a client navigates using a VR headset. Instead of evaluating a flat image, the client stands inside the rendered room, looks up at the ceiling height, turns to see the view from the sofa, and walks to the window to check the sightline. Spatial relationships that are difficult to judge in a 2D image become immediately clear. A ceiling feature that looked proportionate in a render might feel overwhelming at full scale in VR, or a room that looked small on a floor plan might feel open and comfortable when experienced in three dimensions.
Augmented reality previews take a different approach. Using a tablet or smartphone, a client points the camera at their existing space and sees a proposed furniture arrangement or finish overlaid onto the live view of the room. AR does not require a rendered scene to be built first in all cases; some tools apply material and furniture overlays directly to a live camera feed. This makes AR accessible earlier in the design process, useful for quick material comparisons or furniture placement checks before a full render is commissioned.
Both technologies address the core challenge of interior design communication: clients find it difficult to translate two-dimensional plans and images into a felt sense of three-dimensional space. VR eliminates that translation requirement entirely. For projects in Abu Dhabi involving large custom villas or multi-floor commercial spaces, VR walkthroughs have shortened client approval timelines and reduced post-approval revision requests.
The practical limitation is hardware. Full VR walkthroughs require a headset, which not every client has at home, though design studios offering in-office VR review sessions remove that barrier. AR tools require only a smartphone, making them more accessible for remote client reviews.
As of June 2026, design studios in Abu Dhabi that incorporate VR and AR into their visualization workflow are able to offer clients a level of spatial confidence before construction begins that was not possible with traditional rendering alone.
Why Next Interior Design Delivers Results
Next Interior Design has completed 120+ interior projects across Abu Dhabi, covering villas, apartments, offices, and retail spaces. Every project includes 3D visualization before execution, which means clients approve the design in photorealistic detail before a single material gets ordered or a wall gets touched.
The studio’s differentiators are specific:
- Local Abu Dhabi knowledge: The design team understands the architecture, cultural preferences, and lifestyle requirements specific to Abu Dhabi properties, from majlis layouts in traditional villas to open-plan living in modern towers.
- End-to-end service: Concept, visualization, material sourcing, execution, and project management operate under one roof, removing the coordination gaps that cause delays.
- 3D visualization before every project: No client signs off on a design they have not seen rendered to photorealistic standard.
- Certified designers: The team holds formal design qualifications and brings both creative and technical capability to every project.
- Premium materials: Sourced for durability, quality, and finish, not cost-cutting.
- On-time delivery: Project management is non-negotiable, and timelines hold.
Every design is built around the client’s specific brief, not adapted from a template.
What to Do Before Your First Design Consultation
3D interior design visualization removes the guesswork from renovation and interior design by letting you see, evaluate, and approve a space in photorealistic detail before any physical work begins. The rendering process, from file preparation through material mapping and lighting setup, produces images that guide contractors, protect budgets, and produce decisions that hold.
For villa owners, apartment residents, and business owners in Abu Dhabi, the practical value of visualization is concrete: fewer revisions, clearer contractor briefs, and a finished space that matches what was approved.
Choosing a team with direct Abu Dhabi experience, a portfolio of completed local projects, and an established visualization workflow makes the difference between a design that looks right on screen and one that delivers in real life.
Book a free consultation with Next Interior Design today. Call +971 52 278 7404 and speak directly with a certified designer about your project.
Frequently Asked Questions
What is 3D interior design visualization?
3D interior design visualization is the process of producing photorealistic, computer-generated images of an interior space before construction or renovation begins. A designer builds a scaled digital model, assigns accurate materials and lighting, and renders the result as a detailed image or video. Clients use these renders to review, adjust, and approve designs with full visual accuracy.
How does 3D visualization benefit interior designers?
3D visualization gives designers a precise communication tool that replaces vague descriptions and sample boards. Contractors receive rendered references instead of interpreting drawings, which reduces errors during execution. Clients approve designs based on accurate visuals, which lowers the number of mid-project change requests and allows the designer to protect the original design intent through the build.
What free software works best for beginners?
Planner 5D and HomeByMe are the most accessible free browser-based tools for layout planning, requiring no installation or technical background. SketchUp Free suits beginners who need basic 3D modeling with a furniture library. Blender is the most capable free option for photorealistic rendering but requires a greater time investment to learn compared to the other two tools.
How long does a typical render take?
Render time depends on scene complexity, image resolution, and available processing hardware. A single room rendered at standard resolution on a mid-range workstation takes between two and eight hours. High-resolution renders of complex spaces, or animated walkthroughs, can take several days per scene. Cloud rendering services reduce that time by distributing the processing load across multiple servers.
How to prepare files for rendering services?
Submit a dimensioned floor plan in DWG or PDF format, elevation drawings for key walls, a material schedule with supplier codes and color references, a furniture specification sheet with dimensions and reference images, and a lighting plan. Clear file packages avoid assumption-based decisions by the modeler and reduce the number of correction rounds before the final render meets the brief.
—